
Creating DEM from hgt files
Most of Garmin's DEM file structure has recently been unravelled!
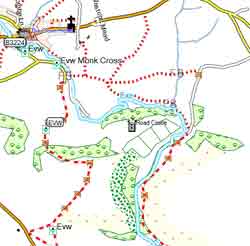
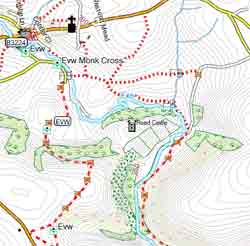
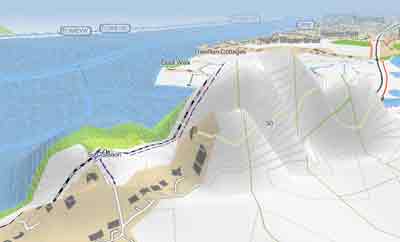
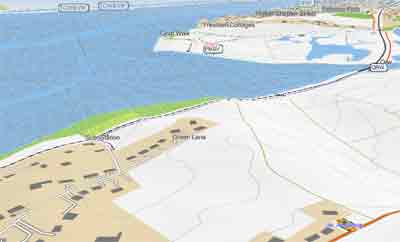
Examples of maps on Basecamp and a GPS created using Openstreetmap data with newly generated DEM
 |
 |
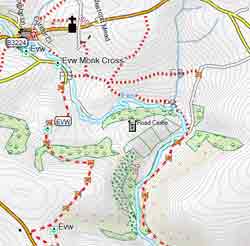 |
| plain | with contours | with contours & DEM |
 |
|
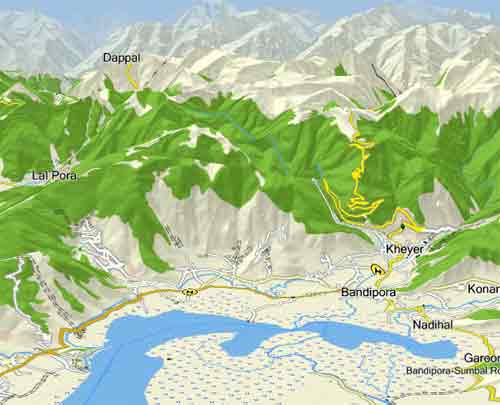
| Tibet using OSM data |
DEM File structure
Most of the file structure is now understood.:
|
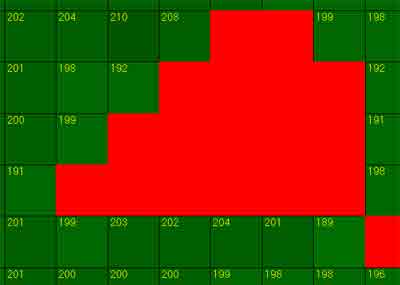
- The same value needs to be decoded differently depending on position in your list, ie
5 can be represented as 00011 or 1111 or 01111 with some bits having a unique significance, ie last one denotes if number is positive. - Height values for each tile are based on the minimum value for that tile .Bitstreams provide values which need to be added or subtracted from the previous height value ; if min value = 56m then the following values produce the following heights ; 2,4,-3,5,2,4 -> 58 62 59 64 66 70
- Tiles are parsed following various codes 1 - 6 or higher
- Pixel sizes are calculated based on 2^32/(360*3600) for 1'' resolution, ie multiples of 3314
The higher the value the more blurred the effect ; the lower the value, the picture not only becomes darker but also shows the outlines of tiles more clearly. Values lower then 300 are not to be recommended :the DEM file takes longer to compile and the image is completely blackened.
 |
 |
| wrong data | correct data |
With HGT Editor you can
|
 |
| This .hgt file contains void data |
DEM Pixel Distance Values
The DEM contains the North-South & East-West values for distances between pixels ; the lower the distance, the darker the effect.
Different values can be used for different levels.
Garmin uses the following values for its TOPOs:
| Spain , Germany, Austria Holland,Poland Topos | 5520;16560;44176;88368 |
| Topo Franc V3 and V4 | 6624 only |
| Topo Italy | 2752;8472;44176;88368 |
| Sweden | 9936;9936;13248;13248;26512 |
Many have found 9936 to give the most pleasing.effect.
DEM Pixels X & Y
These are by default set to &h40 ; by tweaking this number you can create some 'interesting' contrasts depending on your zoom level. However, it is clear that Basecamp is struggling to create all tiles and altering the default values is not to be recommended when you create a gmapsupp! Picture shows 2 tiles of the same map. Right : Using default values &h40 and &h40 Left : Using &h44 and &h44 The lower the number the lighter the image. Notice how the top part of the left tile is not rendered. |
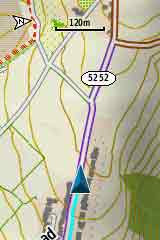
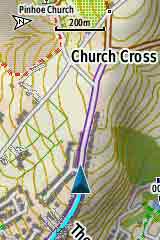
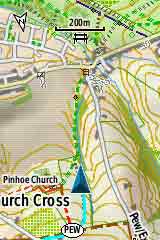
DEM Orientation
On a GPS device if you have set orientation to Track up,your DEM is constantly recalculated depending on the direction you are going - this does not apply to your contours!
 |
 |
 |