
Poly Editor Part 2 Tutorials
Tutorial 1 Creating a poly file
1) Use Basecamp or Mapsource to create a gpx file of your country's outline.
Save as mycountry.gpx
2) From Poly Editor's main menu go File, Open GPX
Select GPX and import your gpx
This should now appear in blue
3) Save GPX as a POLY file
Go File, Save AS
Give it a name ,ie mycountry.poly and Save
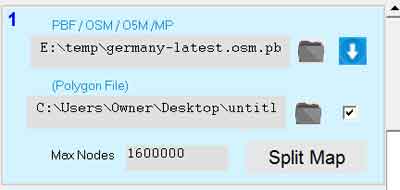 |
In Mapuploader5 click File Icon below POLY Files and tick check box Make sure you have selected a pbf/os5 etc file which covers your country. 4) Click Split Map |
Tutorial 2 Creating multiple areas
1) Add a Background
Use Basecamp or Mapsource to create a gpx file of your country's outline.
Save as mycountry.gpx
2) From Poly Editor's main menu go Background,Add Background
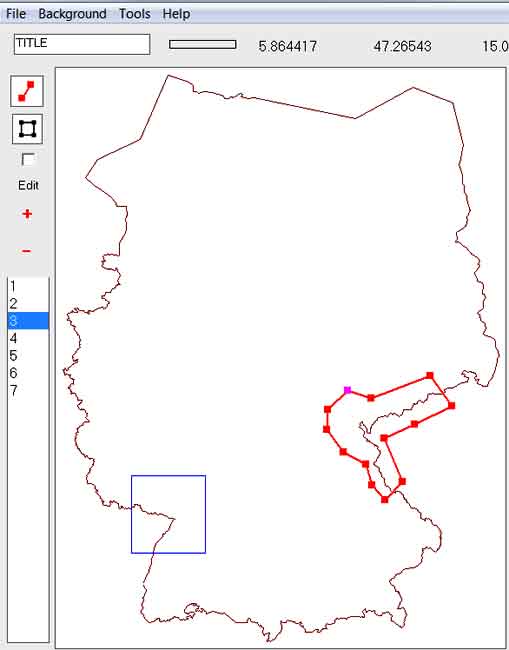
Select GPX , not POLY files and import your gpx This should now appear in dark brown. 3) Use square polygon tool Click on your map and draw an area. To finish , double click on your map. 4) Click the '+' icon to add your new area 5) Use Line Tool to create another polygon Double click to finish.# 6) Click '+' icon to add 7) Save your POLY file Note : poly files can contain multiple areas which must not overlap. |
 |
From main menu go Tools,Edit Poly Files